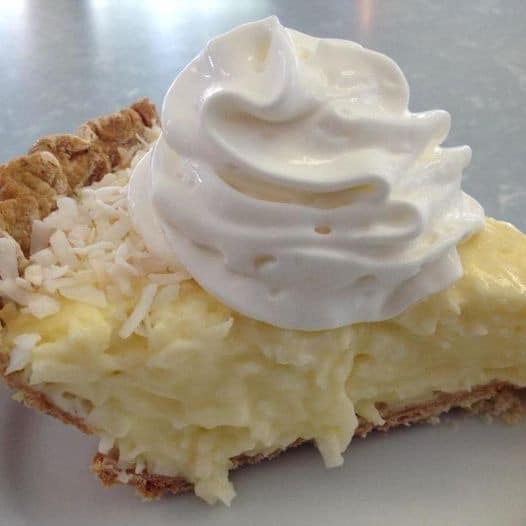
Description: Coconut Cream Pie is a dreamy dessert that combines a buttery pie crust with a rich, creamy coconut filling and a light whipped topping. This pie is the perfect blend of sweet and tropical flavors, making it an irresistible treat for any occasion. Whether you’re serving it at a holiday gathering or enjoying it as a special dessert, this pie is sure to impress.
Who is this Recipe For?
This recipe is ideal for coconut lovers and dessert enthusiasts who appreciate the delicate balance of creamy and crunchy textures. It’s perfect for anyone looking to create a show-stopping dessert for special occasions, family gatherings, or just because you deserve something sweet and indulgent.
Why It’s Great
- Rich & Creamy: The filling is velvety smooth, with the perfect amount of coconut flavor.
- Textural Contrast: The toasted coconut adds a delightful crunch that complements the creamy filling.
- Make-Ahead Friendly: This pie can be prepared in advance, making it a convenient dessert for entertaining.
Ingredients
- 1 cup sweetened flaked coconut
- 3 cups half-and-half
- ¾ cup white sugar
- ½ cup all-purpose flour
- 2 large eggs, beaten
- ¼ teaspoon salt
- 1 teaspoon vanilla extract
- 1 (9-inch) pie shell, baked
- 1 cup frozen whipped topping, thawed
How to Make The Absolute Best Coconut Cream Pie
- Toast the Coconut: Preheat your oven to 350°F (175°C). Spread the sweetened flaked coconut on a baking sheet in an even layer. Bake, stirring occasionally, until the coconut is golden brown, about 5 minutes. Remove from the oven and let it cool.
- Make the Filling: In a medium-sized pot, combine the half-and-half, sugar, flour, beaten eggs, and salt. Cook over low heat, stirring constantly until the mixture thickens and coats the back of a wooden spoon, about 15 minutes.
- Flavor the Filling: Remove the pot from heat. Stir in ¾ cup of the toasted coconut and the vanilla extract. Set aside the remaining toasted coconut for garnishing.
- Assemble the Pie: Pour the warm coconut custard into the pre-baked pie shell. Smooth the top with a spatula. Cover and chill in the refrigerator for at least 4 hours, or until the pie is firm.
- Finish & Serve: Before serving, top the pie with thawed whipped topping. Sprinkle the reserved toasted coconut over the top for a beautiful finish. Slice and enjoy!
Kitchen Equipment Needed
- Baking sheet
- Medium-sized pot
- Wooden spoon
- Spatula
- 9-inch pie pan
Storage
Store the coconut cream pie in the refrigerator, covered, for up to four days. This will keep the pie fresh and maintain its texture.
Can You Freeze Coconut Cream Pie?
Yes, you can freeze coconut cream pie, but it’s best to freeze it before adding the whipped topping. If freezing, prepare the pie in an aluminum pan. Once the pie has cooled, wrap it tightly in a layer of plastic wrap followed by a layer of aluminum foil. Freeze for up to three months. When ready to serve, thaw the pie in the refrigerator overnight. Add the whipped topping and toasted coconut just before serving.
FAQ
1. Can I use fresh coconut instead of sweetened flaked coconut?
Yes, you can use fresh coconut, but it may not be as sweet. You might want to increase the sugar slightly to compensate for the difference.
2. Can I make the pie crust from scratch?
Absolutely! A homemade pie crust would add an extra layer of flavor to this dessert. Just make sure to pre-bake it before adding the filling.
3. What if I don’t have half-and-half?
You can substitute half-and-half with equal parts whole milk and heavy cream to achieve a similar rich texture.
Conclusion
The Absolute Best Coconut Cream Pie is a dessert that will satisfy your sweet tooth and impress your guests. With its creamy coconut filling, crunchy toasted coconut topping, and flaky crust, this pie is truly a slice of paradise. Whether you’re making it for a special occasion or simply to enjoy at home, this coconut cream pie is sure to become a favorite!